Chevy Impala Book
Chevy Impala Book
I'm a professional bookbinder and sometimes, you just have to do projects for yourself. This labor of love took about 10 months of scarce free time. If I had only worked full-time on this book and nothing else, I probably could have finished it in about 3 weeks. The book itself is blank (not sure what I'm going to put in it yet). But I wanted to share photos with others who might like to see it! Thanks for looking. Oh, and my own website with many photos of the other (non-Supernatural!) books I've made can be seen here (click on the gallery page to see a ton of photos of the books I've made over the years):
fineblankbooks.com
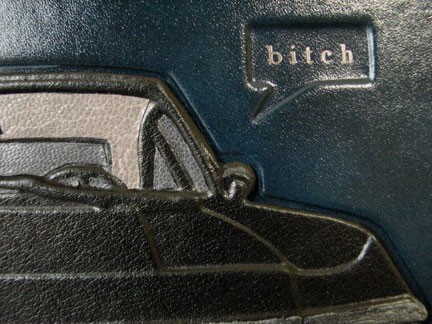
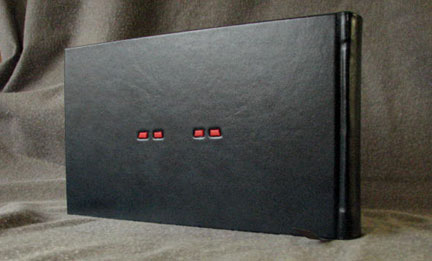
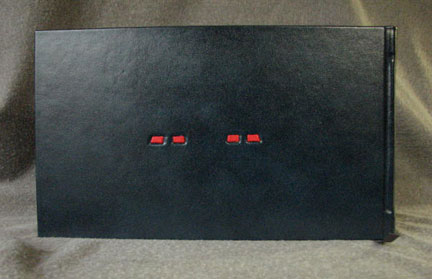
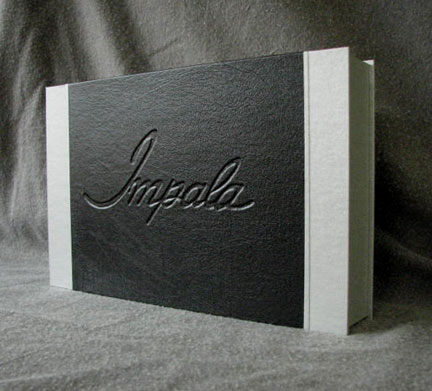
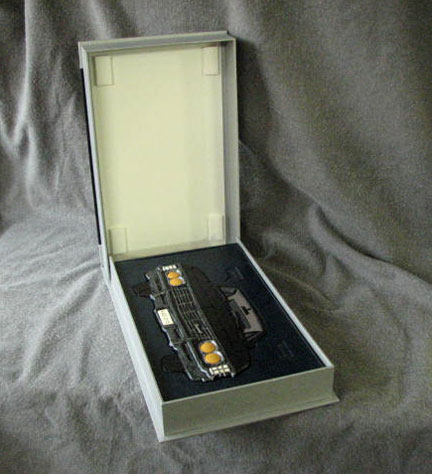
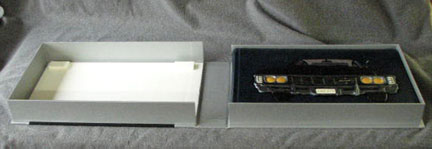
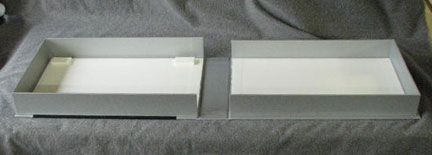
This book has the Impala (of course!) on the front cover with the tail lights on the back cover. It's all done using various types of leather over hand-carved binder's board, matte board, and tag board. This took a ton of time. Anyone interested can read all the steps below the photos. I also just finished a custom clamshell box for this book (made to fit it exactly) that is covered with a silver vellum book cloth which has a nice, soft sheen to it, and more of the black leather used on the car on the book cover.
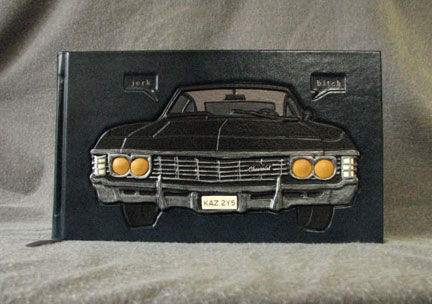
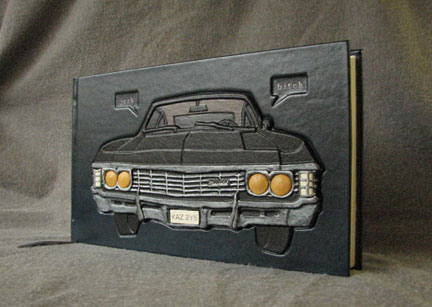
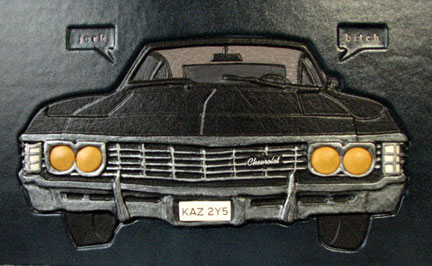




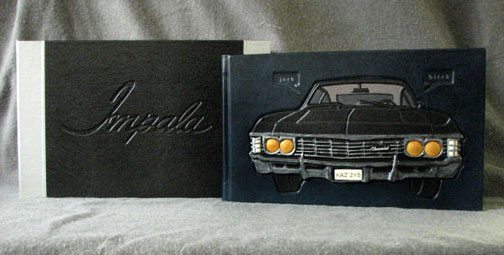
Why'd it take 10 months of scarce "free time"?:
1. cut pages to size from larger sheets of paper
2. fold pages in the center to form 2-pages spreads
3. group folded pages together into 10-page "signatures"
4. punch holes through folded groups of pages
5. sew pages together by hand, with cotton thread, through the holes in the folded sections
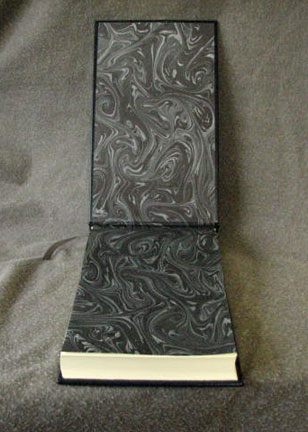
6. attach marbled paper endpapers
7. trim off outer 3 page edges to make them smooth
8. clamp book in clamp spine-up and round the spine
9. add decorative striped headbands to top and bottom of the spine
10. add backing cloth to the back of the spine
11. cut cover boards to size from binder's board and matte board
12. create the impala by drawing out a template of the car from an image found online
13. break the image down into about 8 different layers
14. using the template and carbon paper, draw each layer onto thin tag board
15. cut out each layer from tag board by hand with an x-Acto knife (that skinny grille on the front of the car almost killed me!)
16. when all layers are cut out, glue each one on top of the other in sequence to create the 3-D car from tag board
17. use matte board to build up the extra high areas like the housings around the headlights
18. carve out areas of the headlights, running lights, and license plate where insets will go
19. carve each headlight, running light, and tail light individually from little pieces of binder's board (hard to hold onto while carving; this almost drove me nuts too) and sculpt with x-Acto knife and a file to get the desired rounded or angled shape
20. pare various different colors & types of leather down to paper-thin by hand using a leather parer (basically a razor blade mounted in a clamp that you drag the leather across; hard to do it without putting holes in the leather; luckily I only needed small pieces)...yellow British book calf for the headlights, white kangaroo leather for the running lights and license plate, dark gray goatskin for the interior roof, medium-gray goatskin for the windows, red British bookcalf for the tail lights
21. cover the 3-D car piece with very thin pigskin leather (I can't get this stuff anymore; but it seemed like a fitting way to use my very last pieces of it)
21.a. (forgot this step); set up the tiny script "Chevrolet" with movable metal type and stamp it, in silver foil using hot foil stamping, in the exactly right area on the grille
22. work the leather down into the raised design of the car by hand with a bone folder
23. now that I know the size of the car, trace it and cut out an area on the cover that it will set into
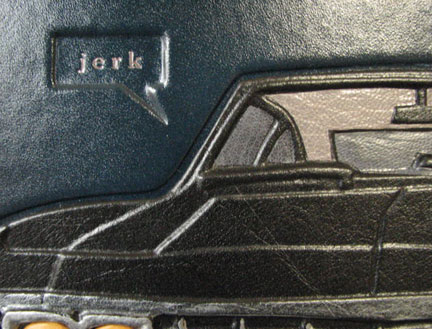
24. cut out recessed areas for "jerk" and " b i t c h "
25. cover all 8 headlights, 8 tail lights, 4 running lights, and 2 license plates with paper-thin pieces of leather
26. very carefully cut the paper-thin gray goatskin leather to fit into the recessed areas in the car interior and windows
27. rough up underlying black leather with sand paper first, then glue down and press the gray leather into those areas
28. highlight "chrome" areas of the car with permanent silver pigment
29. stamp the letters & numbers on the license plate using movable metal type, hot foil stamping, and pewter stamping foil
30. lay out and cover the book cover with antique blue cowhide leather working it down into the recess for the car, the quotes, and the tail lights
31. stamp "jerk" and " b i t c h " on the cover using movable metal type, hot foil stamping, and pewter stamping foil
32. pre-glue the cover to the "book block" (the pages) and then permanently attach them by gluing the endpapers and backing cloth into the the inside of the front & back covers
33. epoxy the various small pieces (headlights and running lights along with the separate "cages" over the running lights) onto the leather-covered Impala
34. rough up the leather on the cover where the Impala will go using a roto-zip tool
35. epoxy the completed Impala piece to the rest of the cover and weigh it down carefully to dry
36. epoxy the individual red leather-covered tail light pieces into the recesses on the back of the cover
37. wax everything with clear wax to protect it
38. measure the finished book
39. cut pieces for the clamshell box (11 pieces in all) from binder's board and edge-glue the side-pieces to the bottom piece for each tray of the box
40. cover side trays of box with silver vellum bookcloth
41. cut out script word "Impala" from thin tag board (after finding just the right font used on the '67 online)
42. laminate thin tag board to binder's board used for box cover
43. cover box cover with black pigskin leather and work it down into the recessed "Impala" word design
44. cover the edges of the front cover, the spine, and the back cover with silver vellum book cloth
45. attach the trays to the front & back covers & let dry
46. line the interior spine of the box with silver vellum book cloth
47. line each tray with archival Arches cover paper
48. cover small foam-core "bumpers" with Arches cover after cutting them out of foam-core
49. permanently attach the foam-core "bumpers" to the inner lid of the box (this leaves air space for the raised design on the front of the book cover and keeps it from rubbing against the interior lid of the box)
50. be glad as hell it's finally done!
 journalbookbinder |
Latest page update: made by journalbookbinder , Jan 26 2012, 12:16 PM EST |
|
Keyword tags:
More Info:
|
| Started By | Thread Subject | Replies | Last Post | ||
|---|---|---|---|---|---|
| SuperZu | Awesome doesn't begin to describe it! | 1 | Jan 29 2012, 7:29 AM EST by CarusoGirl222 | ||
|
Thread started: Jan 28 2012, 7:31 PM EST Watch
JBB is absolutely THE best! Such talent ... such perseverance ... such skill! And what a fan! KUDOS!
|
|||||
| medic04 | AWESOME | 3 | Jan 28 2012, 7:42 PM EST by SuperZu | ||
| Magoober | I think that is so cool. | 0 | Jan 28 2012, 2:50 PM EST by Magoober | ||

